Install Android
Android supports java, c++, c# etc. language to develop android applications. Java is the officially supported language for android. All the android examples of this site is developed using Java language and Eclipse IDE.
Here, we are going to tell you, the required softwares to develop android applications using Eclipse IDE.
There are two ways to install android.
By ADT Bundle
By Setup Eclipse Manually
1) By Android Studio
It is the simplest technique to install required software for android application. It includes:
Eclipse IDE
Android SDK
Eclipse Plugin
Click me to download android adt bundle
If you download the Android Studio from android site, you don't need to have eclipse IDE, android SDK and eclipse Plugin because it is already included in Android Studio.
If you have downloaded the Android Studio, unjar it, go to eclipse IDE and start the eclipse by clicking on the eclipse icon. You don't need to do any extra steps here.
If eclipse is not started, paste the JRE directory inside the eclipse directory.
2) By set up eclipse manually
Visit the next page to learn about setting up android in eclipse manually.
How to setup Android for Eclipse IDE
In this page, you will learn what softwares are required for running an android application on eclipse IDE. Here, you will be able to learn how to install the android SDK and ADT plugin for Eclipse IDE. Let's see the list of software required to setup android for eclipse IDE manually.
Install the JDK
Download and install the Eclipse for developing android application
Download and Install the android SDK
Intall the ADT plugin for eclipse
Configure the ADT plugin
Create the AVD
Create the hello android application
1) Install the Java Development Kit (JDK)
For creating android application, JDK must be installed if you are developing the android application with Java language. download the JDK
2) Download and install the Eclipse IDE
For developing the android application using eclipse IDE, you need to install the Eclipse. you can download it from this location download the Eclipse. Eclipse classic version is recommended but we are using the Eclipse IDE for JavaEE Developers.
3) Download and install the android SDK
First of all, download the android SDK. In this example we have installed the android SDK for windows (.exe version).
Now double click on the exe file, it will be installed. I am using the android 2.2 version here.
4) Download the ADT plugin for eclipse
ADT (Android Development Tools) is required for developing the android application in the eclipse IDE. It is the plugin for Eclipse IDE that is designed to provide the integrated environment.
For downloading the ADT, you need to follow these steps:
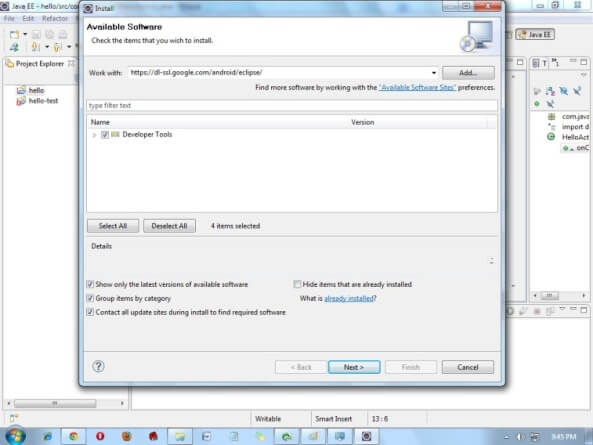
1) Start the eclipse IDE, then select Help > Install new software...
2) In the work with combo box, write https://dl-ssl.google.com/android/eclipse/
3) select the checkbox next to Developer Tools and click next
4) You will see, a list of tools to be downloaded here, click next
5) click finish
6) After completing the installation, restart the eclipse IDE
5) Configuring the ADT plugin
After the installing ADT plugin, now tell the eclipse IDE for your android SDK location. To do so:
Select the Window menu > preferences
Now select the android from the left panel. Here you may see a dialog box asking if you want to send the statistics to the google. Click proceed.
Click on the browse button and locate your SDK directory e.g. my SDK location is C:\Program Files\Android\android-sdk .
Click the apply button then OK.
6) Create an Android Virtual Device (AVD)
For running the android application in the Android Emulator, you need to create and AVD. For creating the AVD:
Select the Window menu > AVD Manager
Click on the new button, to create the AVD
Now a dialog appears, write the AVD name e.g. myavd. Now choose the target android version e.g. android2.2.
click the create AVD
7) create and run the simple android example
Visit the next page to create first android application.
How to make android apps
In this page, you will know how to create the simple hello android application. We are creating the simple example of android using the Eclipse IDE. For creating the simple example:
Create the new android project
Write the message (optional)
Run the android application
Hello Android Example
You need to follow the 3 steps mentioned above for creating the Hello android application.
1) Create the New Android project
For creating the new android studio project:
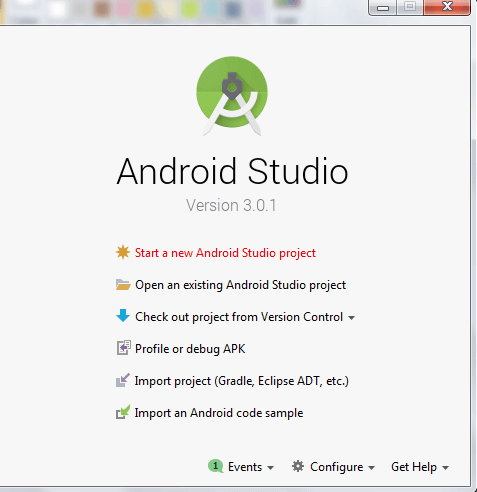
1) Select Start a new Android Studio project
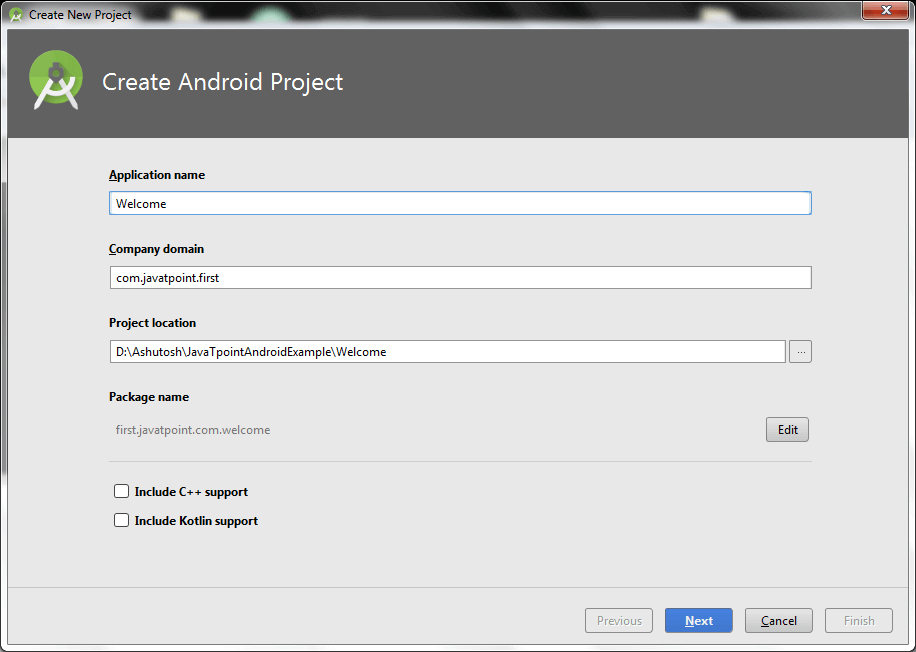
2) Provide the following information: Application name, Company domain, Project location and Package name of application and click next.
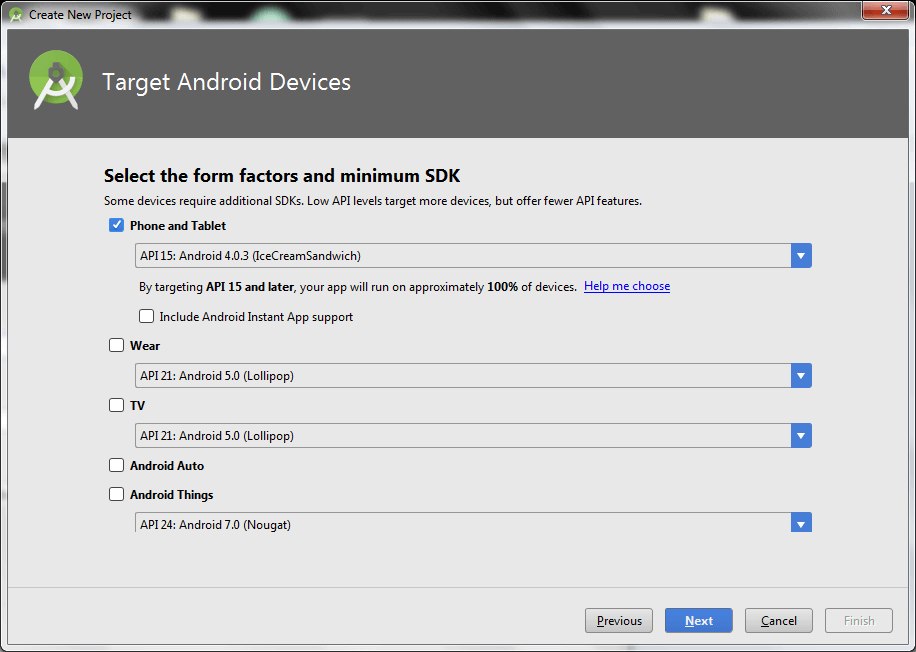
3) Select the API level of application and click next.
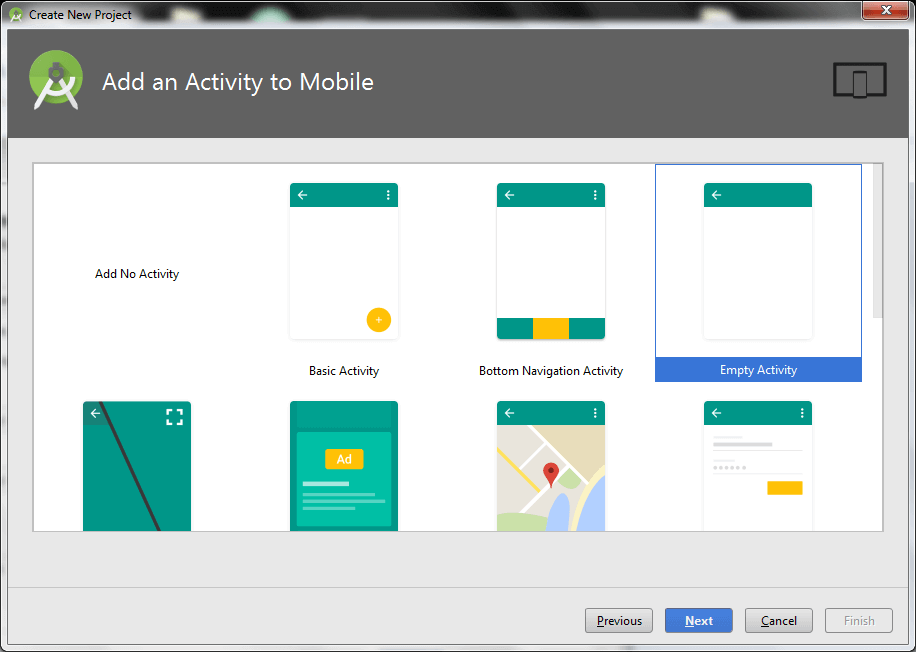
4) Select the Activity type (Empty Activity).
5) Provide the Activity Name and click finish.
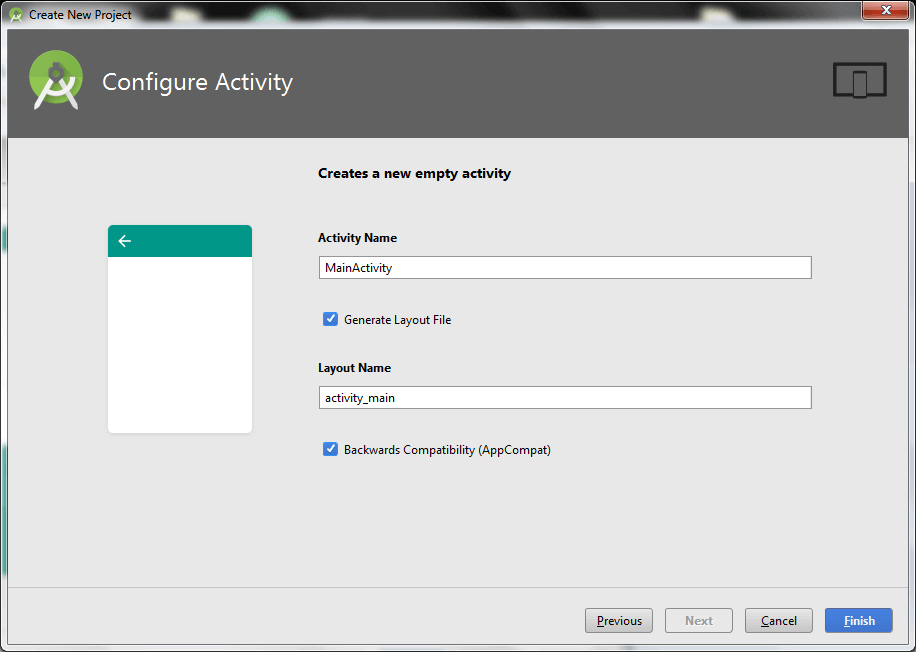
After finishing the Activity configuration, Android Studio auto generates the activity class and other required configuration files.
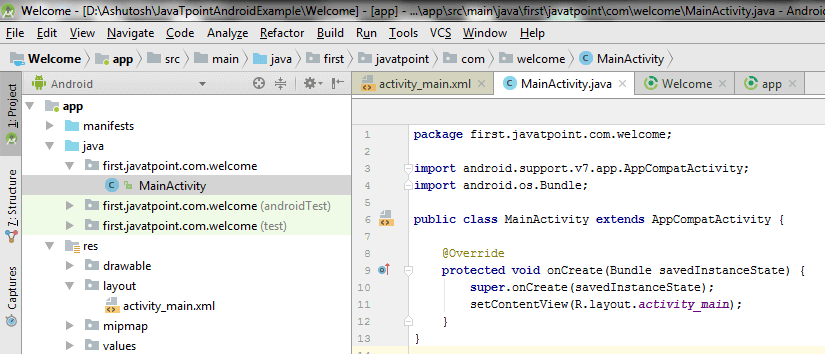
Now an android project has been created. You can explore the android project and see the simple program, it looks like this:
2) Write the message
File: activity_main.xml
Android studio auto generates code for activity_main.xml file. You may edit this file according to your requirement.
----------------------------------------------------------------------
<?xml version="1.0" encoding="utf-8"?>
<android.support.constraint.ConstraintLayout xmlns:android="http://schemas.android.com/apk/res/android"
xmlns:app="http://schemas.android.com/apk/res-auto"
xmlns:tools="http://schemas.android.com/tools"
android:layout_width="match_parent"
android:layout_height="match_parent"
tools:context="first.javatpoint.com.welcome.MainActivity">
<TextView
android:layout_width="wrap_content"
android:layout_height="wrap_content"
android:text="Hello Android!"
app:layout_constraintBottom_toBottomOf="parent"
app:layout_constraintLeft_toLeftOf="parent"
app:layout_constraintRight_toRightOf="parent"
app:layout_constraintTop_toTopOf="parent" />
</android.support.constraint.ConstraintLayout>
}
-------------------------------------------------------------------------
File: MainActivity.java
-------------------------------------------------------------------------
package first.javatpoint.com.welcome;
import android.support.v7.app.AppCompatActivity;
import android.os.Bundle;
public class MainActivity extends AppCompatActivity {
@Override
protected void onCreate(Bundle savedInstanceState) {
super.onCreate(savedInstanceState);
setContentView(R.layout.activity_main);
}
}
--------------------------------------------------------------------------
To understand the first android application, visit the next page (internal details of hello android example).
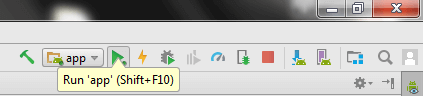
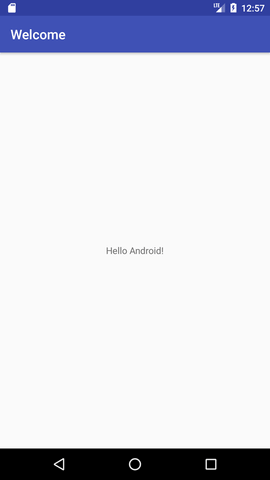
3) Run the android application
To run the android application, click the run icon on the toolbar or simply press Shift + F10.
The android emulator might take 2 or 3 minutes to boot. So please have patience. After booting the emulator, the android studio installs the application and launches the activity. You will see something like this:
Want to learn more about "Android" ? Visit : https://www.javatpoint.com